Back-to-School Frugal Gift for Teachers
With the back-to-school season around the corner, it's high time to prepare a heartfelt welcome for your children's new teachers. A homemade, practical gift is a great way to establish a positive relationship and show appreciation from the get-go.
Recently, I crafted some unique, affordable gifts that were loved by teachers and easy enough for my little ones to contribute to. Here's an easy step-by-step tutorial on how to create these DIY teacher appreciation gifts using everyday items you likely have at home or can find at a local store!
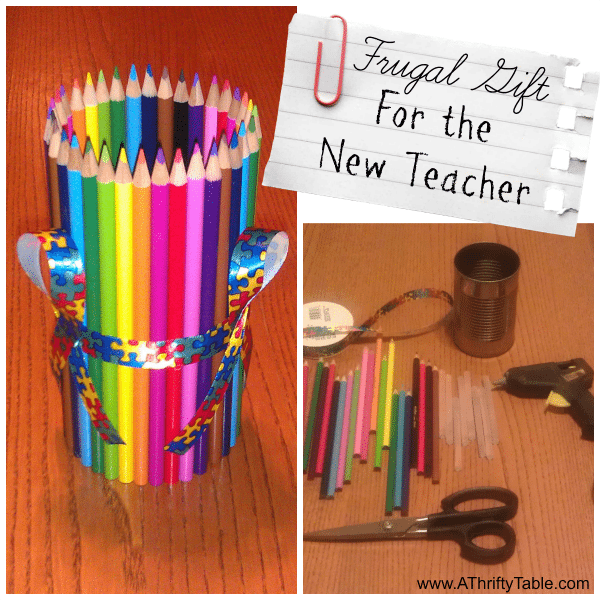
The gift I made was a decorated stationery can, packed with useful supplies such as pens, pencils, glue sticks, markers, and crayons. The kids enjoyed helping me create them and were eager to present them to their teachers on the first day of school. The best part? This thoughtful gift was easy on my wallet and took only a few minutes to make.
The supplies for each gift set cost around $3, a bargain considering the personal touch and practicality of the end product. For my project, I used 35 colored pencils, which is just short of three boxes. These pencils cost just 50¢ per box! The adornment was a simple ribbon, costing $2, but I used it sparingly for each gift. For the assembly, I used hot glue sticks that were around 25¢ each, with four sticks utilized per gift. And let's not forget the best part – the can was free, repurposed from my pantry!
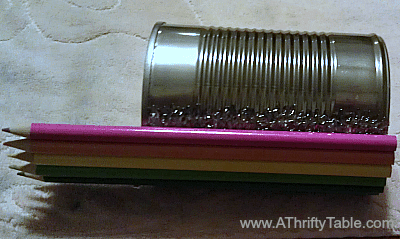
I applied the glue to the can by moving the glue gun in a zigzag pattern, like a series of ‘w's. This method ensured a stronger bond between the can and the pencils, given the relatively large ridges in the can. I was careful to position the can upright and face the pencil logo towards the can, ensuring the bottom of each pencil remained flat while I secured it.
Once all the pencils were in place, it was time to add the ribbon. To ensure the ribbon stayed firmly in place, I dabbed a small amount of hot glue onto every few pencils. After the ribbon was securely wrapped around the can, I added a final flourish with some criss-crossed ribbons.
Then I made sure to stand the can upright and put the pencil logo toward the can, while making sure the bottom of the pencil remained flat while I secured it to the can. Once all of the pencils were on, I applied the ribbon.
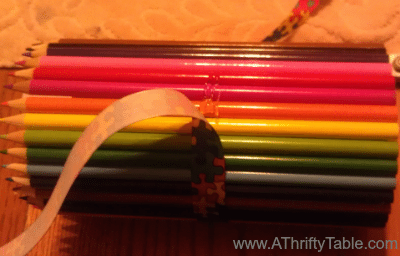
I made sure to put a little bit of hot glue on every few pencils, to keep the ribbon in place. Once the ribbon around the container was secure, I added some criss-crossed ribbons to it.
This DIY back-to-school teacher gift is a fun, affordable, and thoughtful way to start the new school year on a positive note. Not only does it serve as a delightful and useful gift, but it's also an enjoyable craft project for kids to contribute to. This activity fosters creativity, resourcefulness, and the joy of giving, all while providing teachers with the supplies they need for the classroom.
Remember, it’s not about the price tag on the gift, but the thought and effort behind it that leaves a lasting impression. Creating your homemade teacher appreciation gifts is a beautiful way to express gratitude while teaching your kids the value of creativity and thoughtfulness. So go ahead, try this project, and start the academic year with this lovely gesture. Your efforts will undoubtedly be appreciated, and you'll be remembered for your thoughtfulness and creativity.