Easy Winter Science Experiments for Kids Using Pantry Staples


Winter means a lot of indoor time, and I've learned that science experiments are a lifesaver on those long, cold days. The best part? You don't need anything fancy. Baking soda, vinegar, food colouring, and a few other pantry staples are all it takes to keep kids busy and actually teach them something cool.
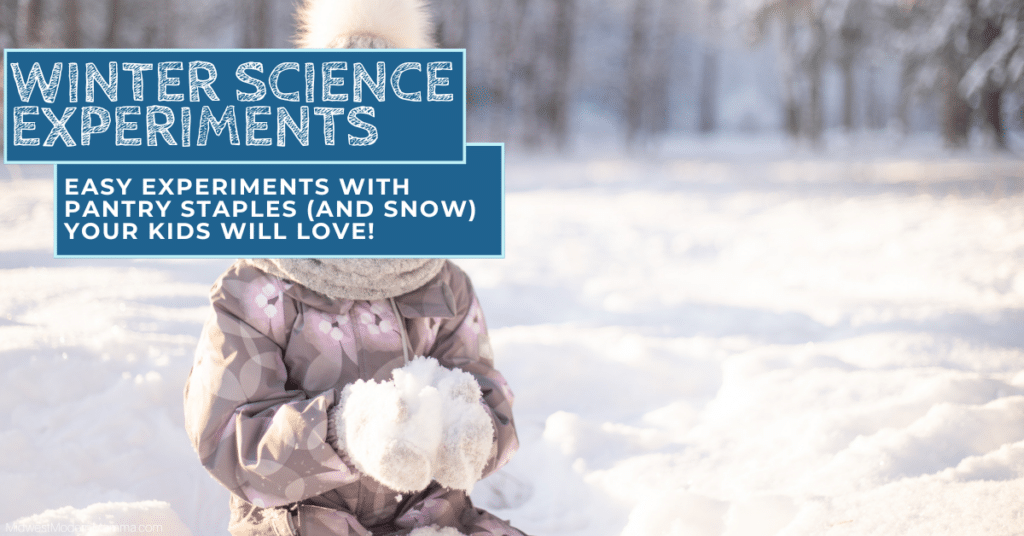
These winter-themed experiments are perfect for exploring the science of cold weather right from your kitchen table. From fizzing chemical reactions to mesmerizing non-Newtonian fluids, each activity teaches important concepts while keeping kids engaged and entertained. Plus, they're wonderfully hands-on, which means lots of sensory exploration and plenty of “wow” moments that make learning stick.
Baking Soda and Vinegar Experiments
You really can't go wrong with the classic baking soda and vinegar combo! It's like magic every single time, and there are so many creative ways to give it a winter twist.
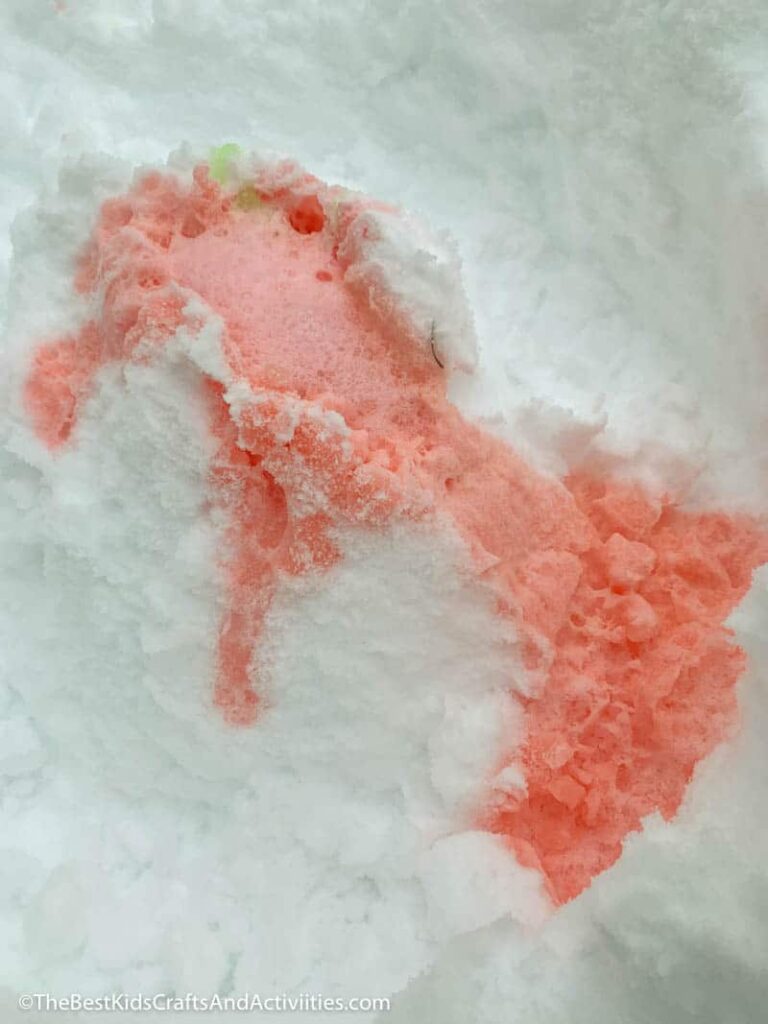
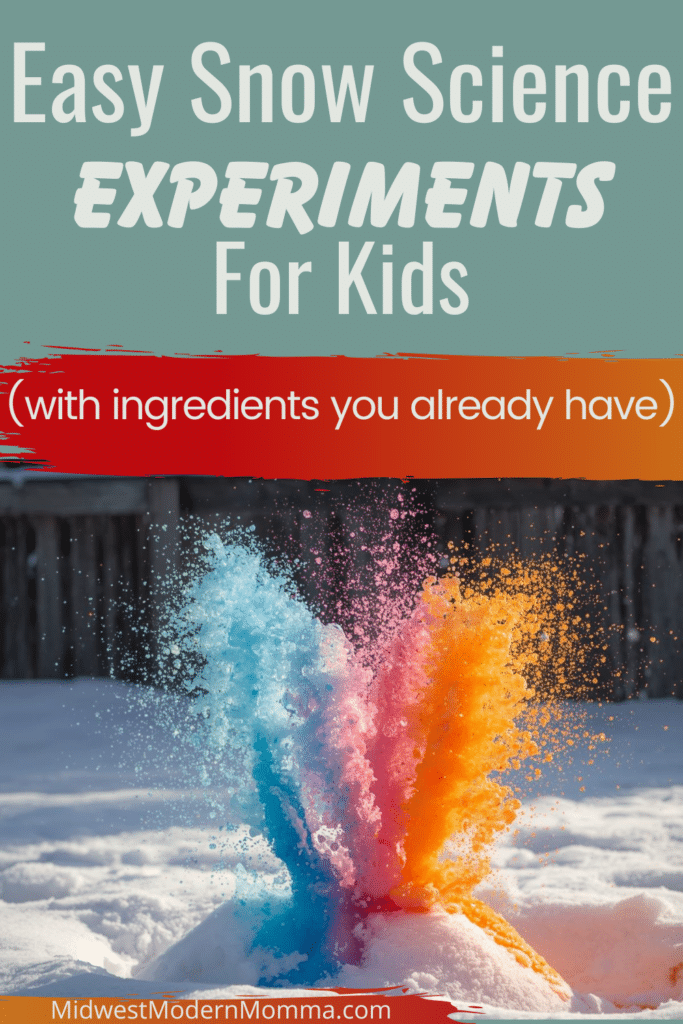
Baking Soda Snow Volcano
Who says volcanoes are just for summer? The Best Kids Crafts and Activities shows how to create a snow volcano that works perfectly outdoors in real snow, or you can bring it inside with fake snow. Either way, kids will love the dramatic eruption!
Fizzing Snowflakes
Little Bins for Little Hands has a beautiful setup for this one. Use snowflake cookie cutters to shape baking soda mounds, then let kids use droppers to add colored vinegar. Watching those snowflakes fizz and bubble is absolutely mesmerizing! You can add a sprinkle of glitter if you'd like some extra sparkle, though I know some families prefer to skip it for environmental reasons.
Exploding Snowman
This one from 123 Homeschool 4 Me is honestly so clever. Draw a snowman face on a plastic bag, add baking soda and vinegar, and watch your snowman “explode” with gas! It's silly, surprising, and teaches great science all at once.
The Grinch's Growing Heart
Perfect timing for the holidays! This experiment is such a sweet way to combine a beloved story with hands-on science. You'll draw a red heart on a green balloon, fill it with baking soda, and attach it to a bottle of vinegar. As the chemical reaction happens, kids watch the Grinch's heart grow three sizes right before their eyes!
Salt and Ice Science
Salt and ice experiments are fantastic for teaching kids why we salt sidewalks and roads in winter. The science behind freezing point depression suddenly becomes real and understandable!
Ice Fishing Experiment
This one feels like a magic trick! Science Kiddo walk you through it. Place ice cubes in water, lay a string across one cube, sprinkle salt on it, wait about 30-60 seconds, and then lift. The string will be frozen to the ice! The salt melts the ice slightly, then the water refreezes around the string. Kids are always amazed by this one.
Salt and Ice Art
If you want to create something beautiful while learning, try this from Learning and Exploring Through Play. Freeze a large block of ice, sprinkle coarse salt over it to create channels and tunnels, then drop food coloring into those melted areas. The colors spread through the ice in the most gorgeous patterns—it's art and science rolled into one!
Melting Ice Hands
Happy Hooligans has such a fun twist on this classic experiment. Fill latex gloves with colored water, freeze them overnight, then peel off the gloves to reveal colorful ice hands. Kids sprinkle salt on them and watch them melt, which is both slightly spooky and completely fascinating. It's a wonderful tactile way to learn about how salt affects ice.
Frost in a Can
You can actually make frost appear right before your eyes! Life Over C's shows how simple it is—fill a tin can with ice and water, add salt, shake gently, and watch frost form on the outside of the can. The salt lowers the melting point, pulling heat from the air and creating visible frost. It's such a clear demonstration of how temperature and salt interact!
Oobleck (Cornstarch and Water)
If you haven't explored oobleck with your kids yet, you're in for a treat! This strange substance acts like both a solid and a liquid, which never fails to fascinate children (and adults too, honestly).

Peppermint Oobleck
I have to share my own Peppermint Oobleck recipe for a festive winter twist! Adding peppermint extract gives it a wonderful seasonal scent that makes the whole experience feel extra special. The red and white colors create a candy cane effect while kids explore this fascinating non-Newtonian fluid. It's perfect for holiday-themed science fun!
Snowflake Oobleck
Little Bins for Little Hands creates a winter wonderland version with classic oobleck proportions. Add white food coloring or leave it natural, then toss in some snowflake sequins and silver glitter. Watching kids discover how it behaves differently when they touch it slowly versus quickly is priceless!
Frozen Oobleck
Want to take oobleck to the next level? Inspiration Laboratories suggests making your oobleck, pouring it into molds, and freezing it. As it thaws during play, kids get to observe how it transitions from frozen solid back to its weird liquid-solid state. It's a double dose of states-of-matter learning!
Ice Experiments
Frozen Bubbles
This winter activity from Fox Farm Home is a real crowd-pleaser! Make a special bubble solution with warm water, corn syrup, sugar, and dish soap, chill it for 30 minutes, then head outside on a very cold day (close to zero degrees) with straws. Kids will love watching ice crystals form on the bubbles as they freeze!
Fizzing Ice
Life Over C's combines two favorites—ice and the baking soda-vinegar reaction! Cover ice cubes with baking soda, food coloring, and a bit of dish soap, then use droppers to add vinegar. The cold temperature slows down the reaction, which means it lasts longer and gives kids more time to observe. It's a wonderful way to teach how temperature affects chemical reactions.
Ice and Science Investigation
This is perfect for teaching the scientific method! Only Passionate Curiosity suggests setting up a true experiment where kids test different substances—salt, sugar, cornstarch, coffee, sand, and baking soda—on separate ice cubes to see which melts ice fastest. Have them make predictions first, then observe, measure, and draw conclusions. It's real science in action!
Tips for Success
Safety First: I always recommend having kids wear safety goggles during experiments. It makes them feel like real scientists and keeps their eyes protected!
Embrace the Mess: Let's be honest—these experiments can get wonderfully messy, and that's part of what makes them so fun! Set up in an easy-to-clean space, use trays to contain spills, and keep plenty of towels nearby. Your future self will thank you.
Ask Questions: Before starting each experiment, ask your kids what they think will happen. Afterward, talk about what they observed. Why do they think it happened? What would change if you used more or less of something? These conversations are where the real learning happens.
Document Discoveries: Encourage kids to draw pictures or take photos of their experiments. Older children might enjoy keeping a science journal where they write down their observations and thoughts. It's so fun to look back on these later!
Adjust Quantities: Don't stress about perfect measurements—science is all about experimentation! If your oobleck is too runny, add more cornstarch. If the vinegar reaction seems weak, add more baking soda. Let kids be part of the problem-solving process.
The Science Behind the Fun
These simple experiments teach some really important scientific concepts in ways kids can actually understand and remember.
Chemical Reactions: When baking soda (a base) meets vinegar (an acid), they create carbon dioxide gas. That's what causes all that exciting fizzing and bubbling! It's the same type of reaction that happens in baking.
Freezing Point Depression: Salt lowers water's freezing point, which is exactly why it melts ice on sidewalks and why ocean water freezes at lower temperatures than the fresh water in your ice cube tray. Understanding this helps kids make sense of winter weather phenomena they see every day.
Non-Newtonian Fluids: Oobleck is such a cool example of how some materials don't follow the usual rules. It responds to pressure in unexpected ways, acting like a solid when you squeeze it but flowing like a liquid when you let it rest. It's a concept that challenges what kids think they know about how materials behave!
States of Matter: Ice experiments beautifully demonstrate how water changes between solid, liquid, and even gas states. Kids can see these transformations happening right in front of them, making abstract concepts concrete and understandable.
The best part about these winter science experiments is that they require minimal preparation and use ingredients you probably already have. Whether you're a parent looking for a snow day activity, a teacher planning STEM lessons, or a caregiver seeking indoor entertainment, these experiments deliver both educational value and pure joy.
Winter might keep us inside more often, but with these pantry staple science experiments, there's no shortage of discovery and wonder to be found right in your own kitchen.
More Science and Sensory Fun
Looking for more hands-on learning activities? Check out these posts:
- 7 Sensory Bin Tools You Need – Essential tools to make the most of your sensory play setups
- Walking Water Experiment Lesson Plan – A colorful science activity that teaches capillary action
- 10 Spring Science Activities – More seasonal science fun for when the weather warms up
- Christmas Sensory Bin Ideas – Festive sensory play for younger learners
What's your favorite winter science experiment? Share your experiences and variations in the comments below!